As a beginner, you may be confused about where you can install WordPress and start to build a website, in this article I will show you how to install WordPress with cPanel on any hosting, as well as with Siteground starter wizard and Bluehost dashboard.
cPanel is the most popular hosting control panel, most hosting providers use cPanel in their services, and even though Siteground and Bluehost offer their control panel to users, the bottom panel is still cpanel.
WordPress.org and wordpress.com
You should know that “WordPress” is what we always say is wordpress.org not wordpress.com before installing it, to avoid mistakes and unnecessary costs. What are the differences between them?
WordPress (.org) is the most popular CMS(content management system) website builder in the world, not “one of”, there are more than 35% of the websites in the world are built with WordPress.
WordPress.com is an online website-building platform base on wordpress.org, you can also create a website with wordpress.com but at a higher cost, you don’t need to install anything on wordpress.com to create a website.
So today we talk about installing WordPress from wordpress.org.
Web Hosting
To install WordPress and build a website, you have to find someplace to store the files and data, so you need web hosting where you can install WordPress and start your website. You can check our reviews for 10 best web hostings to choose one of them to start.
I chose 3 popular and excellent web hostings and am gonna show you how to install WordPress.
Install WordPress with cPanel On Chemicloud
Chemicloud is a relatively new web hosting provider in the industry, but it is very excellent, we tested the server response time, and it is the fastest web hosting of those I ever used, please check the Chemicloud review for more information, this is the one reason why I show you how to install WordPress by using Chemicloud hosting, the other reason is Chemicloud use cPanel for the hosting control panel.
Most web hosting providers use cPanel as the control panel for their hostings, cPanel is definitely the most popular control panel, once you buy web hosting from other companies and they use cPanel too, then you can follow this tutorial.
Step 1. Sign up for a plan on Chemicloud
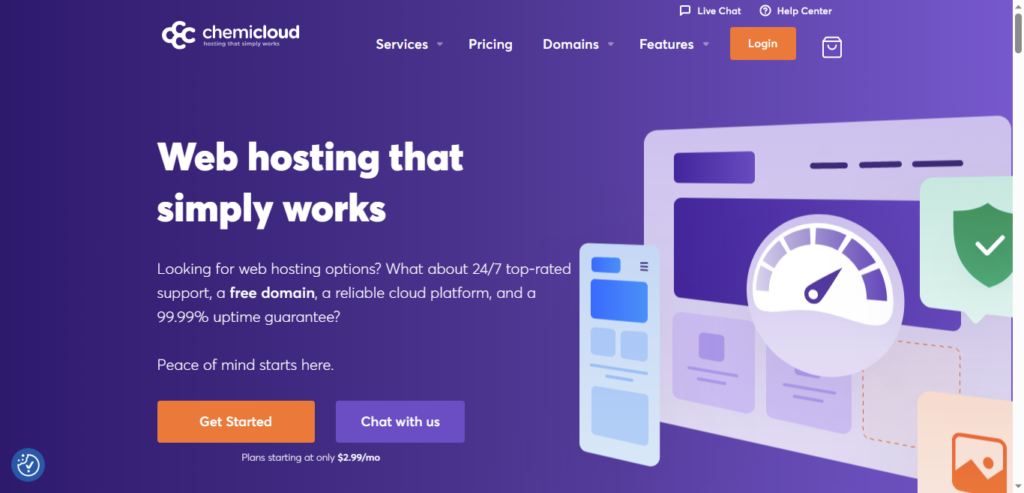
Choose the Web Hosting Starter plan by clicking the button “Get Started at only $2.99/mo” as shown in the below picture, then click “Order now”.
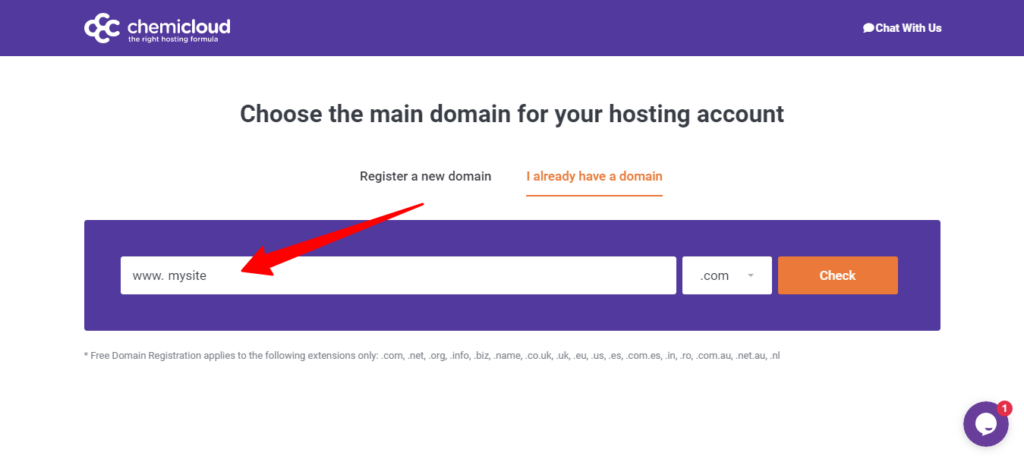
It will go to the page to ask you to choose a domain name, if you already have a domain name, then you enter your domain name in the table and check, it will show you if the domain name is available. if you don’t have a domain name, you can register a new domain with your name, your business name, your brand name, or any name you like, this is a free domain name for 1st year on Chemicloud once you purchase the web hosting plan.
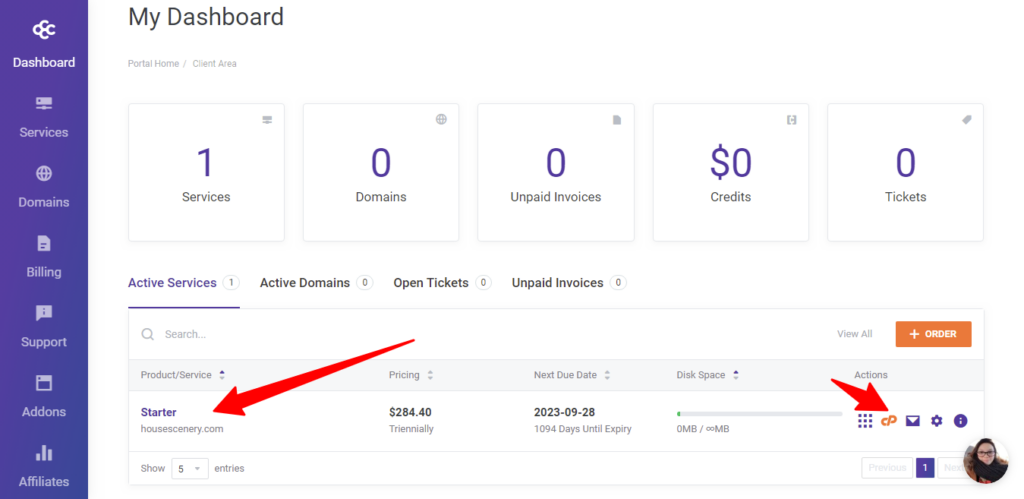
Next, You just follow the page guide and choose a server location and pay for the web hosting, don’t need to order any other addons or extra tools or features. once you confirmed and paid the order, you just login to your account and go to the service option, the plan you bought from Chemicloud should be activated.
Step 2. Login to cPanel
Click the icon of cPanel, the orange icon as in the above screenshot, and login to cPanel. you can overview the features and options on the cPanel, then scroll down to the bottom, you will find something “Most Popular Apps”, you will find the first one is WordPress, click the icon to start to install WordPress.

Step 3 . Install WordPress
When you click the WordPress icon, it will go to Softaculous page, you will see the installation page of WordPress, click “install now”, and the installer will ask you to enter some information before real installation like the Installation URL, admin name and password, and more, please enter URL, admin name, password, and email carefully and record this information, all of that is used for logging in your WordPress admin dashboard after the install finished.
For other information, you can leave all of them as default.
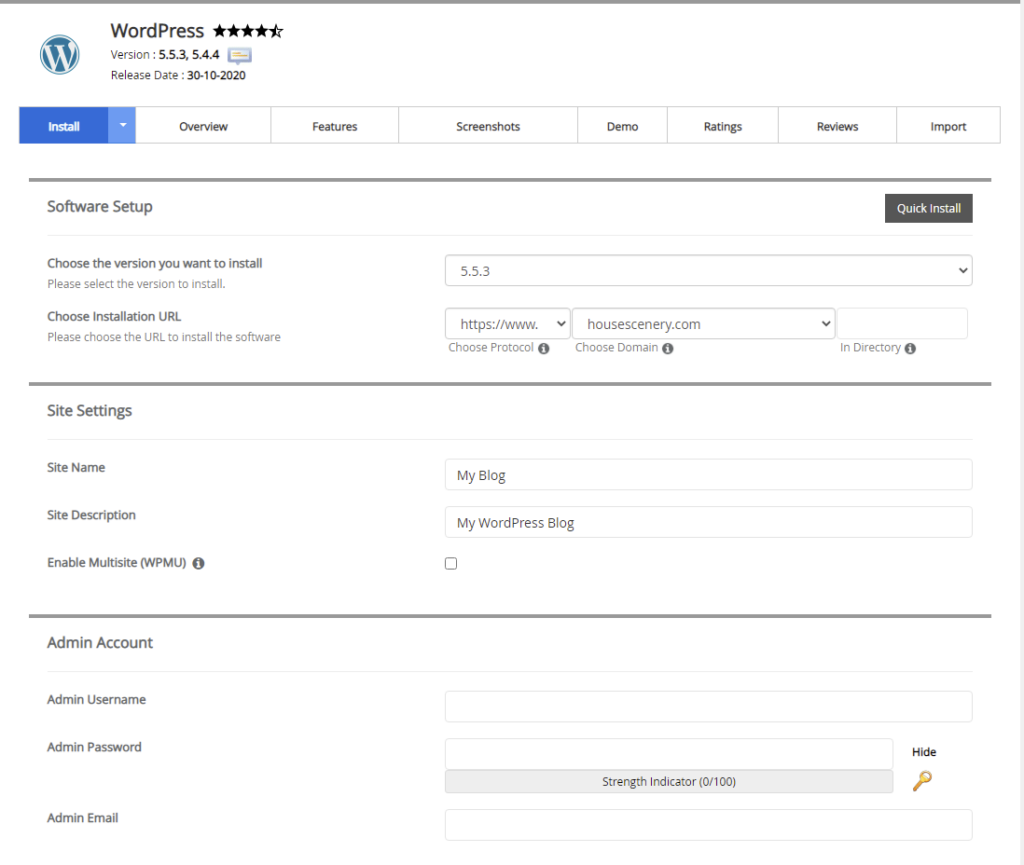
Once you finished entering all information, click install, WordPress is installed and finished in less than 3 minutes, actually, less than 1 minute when I install WordPress.
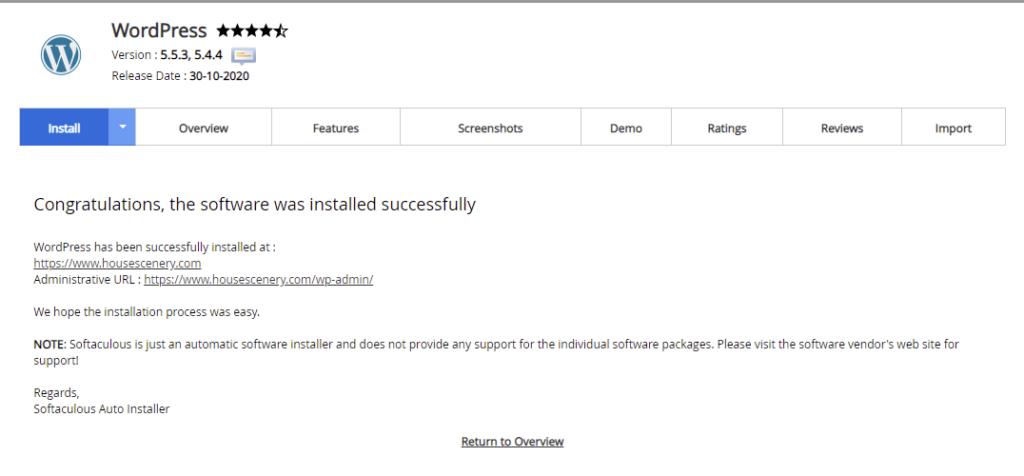
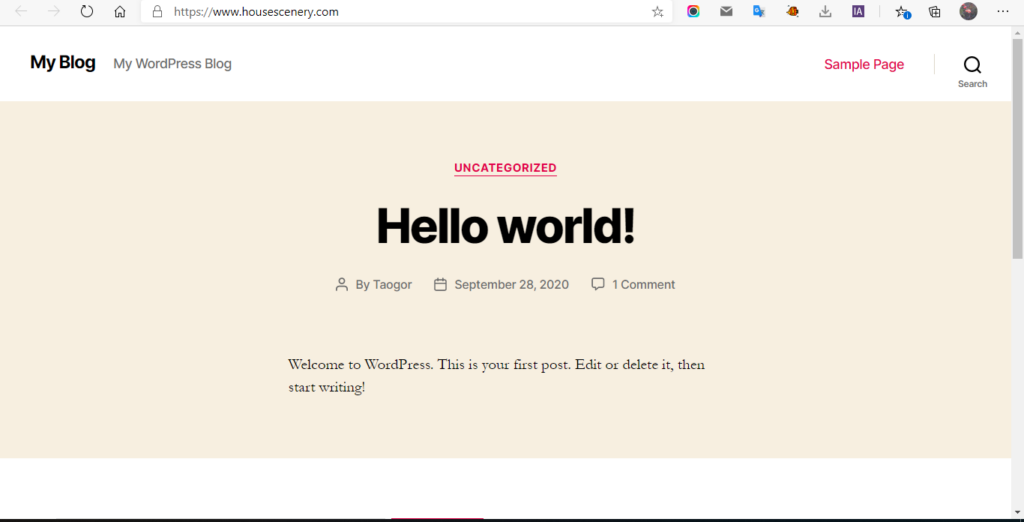
The above screenshot shows the successful page, all done. anyway, Check how is your website now by clicking the URL on the page and logging in to the WordPress dashboard from the administrative URL.
The above tutorial is not only for Chemicloud, but any provider also offers cPanel and Softaculous, which you can use to install WordPress.
Install WordPress On SiteGround
SiteGround is a very famous hosting provider with the highest reputation in the industry. Please read an in-depth Siteground review to learn more about the company.
The technical department of Siteground developed its own control panel – client area and site tools for the hostings, all of the hosting management was transferred to site tools from cPanel in 2019. that’s easier and more friendly to users than cPanel.
First of all, you need to sign up for a web hosting plan on Siteground too, we choose StartUp to start.
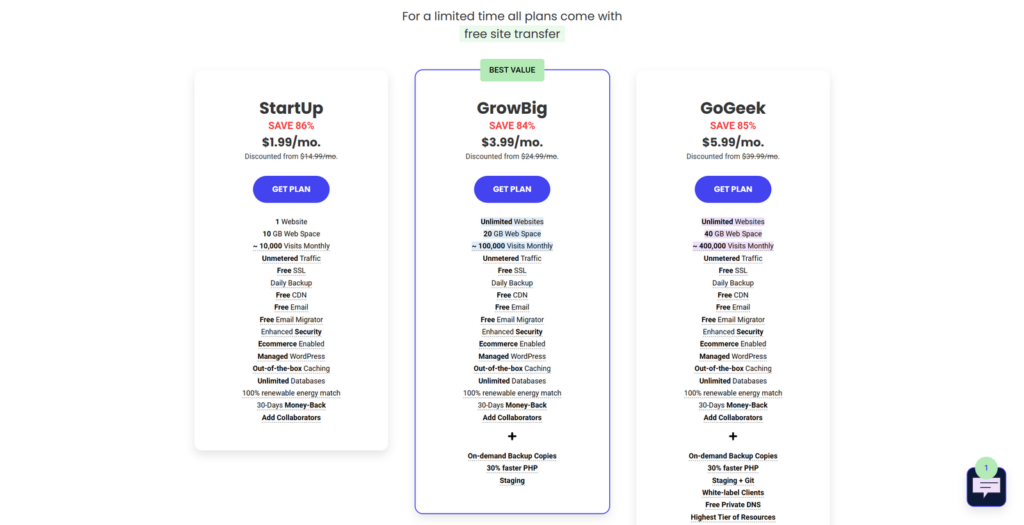
Please just follow the steps of Siteground to purchase the web hosting, once you paid and login to your account, you can start to install wordpress from the client area of Siteground.

Install WordPress with SiteGround Website Setup Wizard
When you login to your account for the first time, you will see a notice asking you if you want to create a new website or migrate it to your account. Click on the button “SET UP Site”.
The setup wizard will ask you to choose a domain, you can register a new domain on Siteground, but it is not like Chemicloud, you need to pay for that, or you can read this article to choose one domain registrar to get a domain and connect to Siteground hosting. after that, the section of the wizard will ask you to set up a site or migrate a website.
Click the Button on Select Start New Website

You will have some options on the next page, WordPress, WordPress+Woocommerce, and Weebly…, just choose WordPress and click on it.
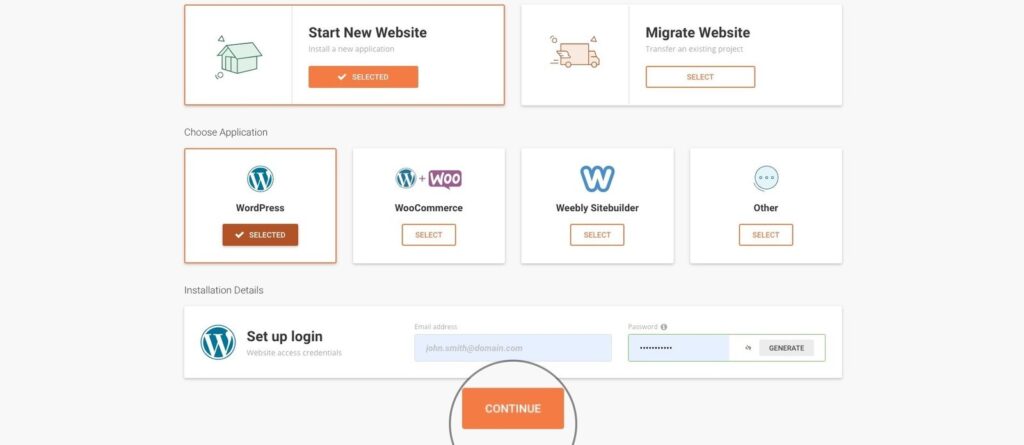
In the table of Set up login, enter your email and admin password or generate a new password by the generator, this is the same as the one that I mentioned in the above cPanel for you logging in WordPress dashboard. Once you are ready, click on Continue.
Next, choose what enhancements or add-ons you want to add to your account – if you want to add any. click on Finish once you are ready for all.
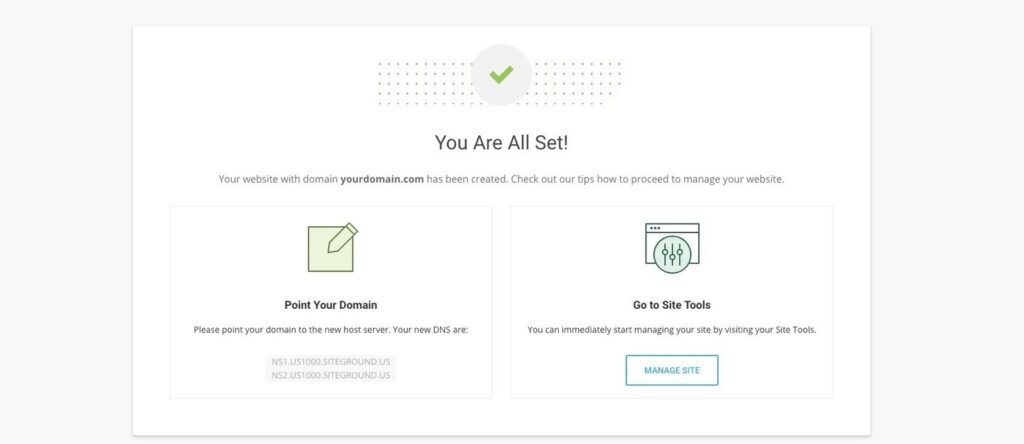
That’s it! You can now go to the front page of your site and check out the newly installed WordPress application. if you have the external registered domain, you can point it to Siteground. you can also Go to site Tools to manage your website.
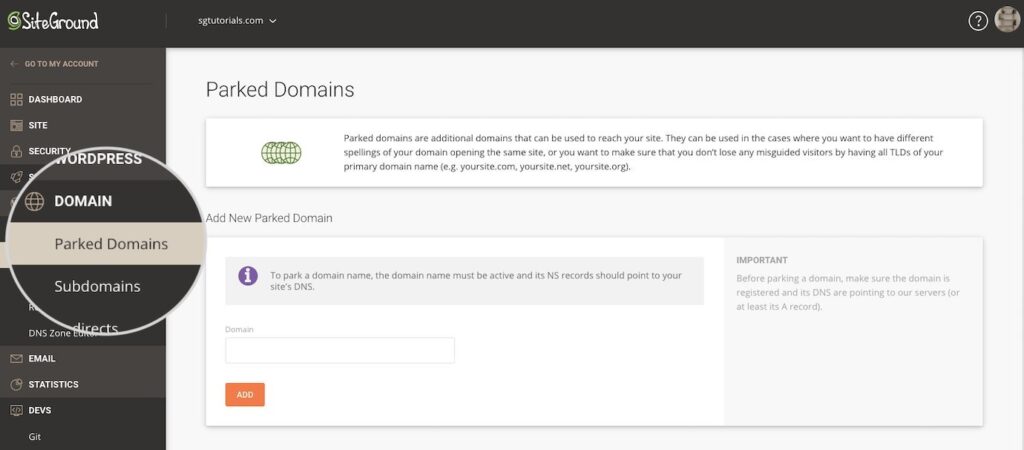
Install WordPress On Bluehost
Bluehost is one of the Veteran and famous web hosting providers, they announced that they are the recommended provider by WordPress on their website, and many people (around 2 million) chose Bluehost to create their websites with WordPress. you can also read the review of Bluehost website builder to learn more about Bluehost.
Like Siteground, Bluehost uses its own control panel to manage the websites, you can install WordPress from the control panel directly not cPanel, it is also easier and more friendly to users.
You also need to sign up for a web hosting plan on Bluehost firstly, I recommend the beginner to choose a Basic plan to start the website.
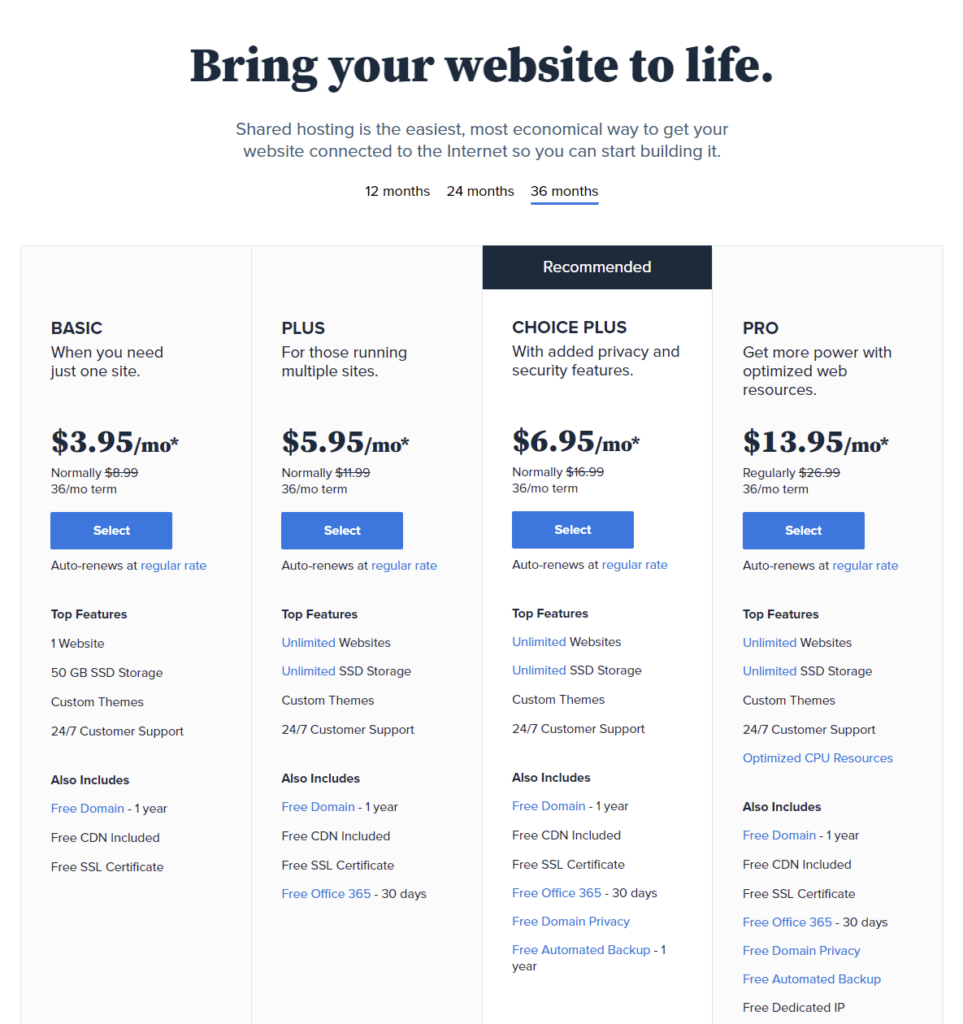
Click on the SELECT button to start the process, it will ask you to choose a domain in the next step, As you can see the basic plan offers a Free Domain for 1 year in the above picture, so you can enter your favorite domain name in the table and click Next. you just follow the guide to fill in the information and don’t choose other extra features or enhancements, then pay for it.
Install WordPress from Bluehost Dashboard(Bluerock)
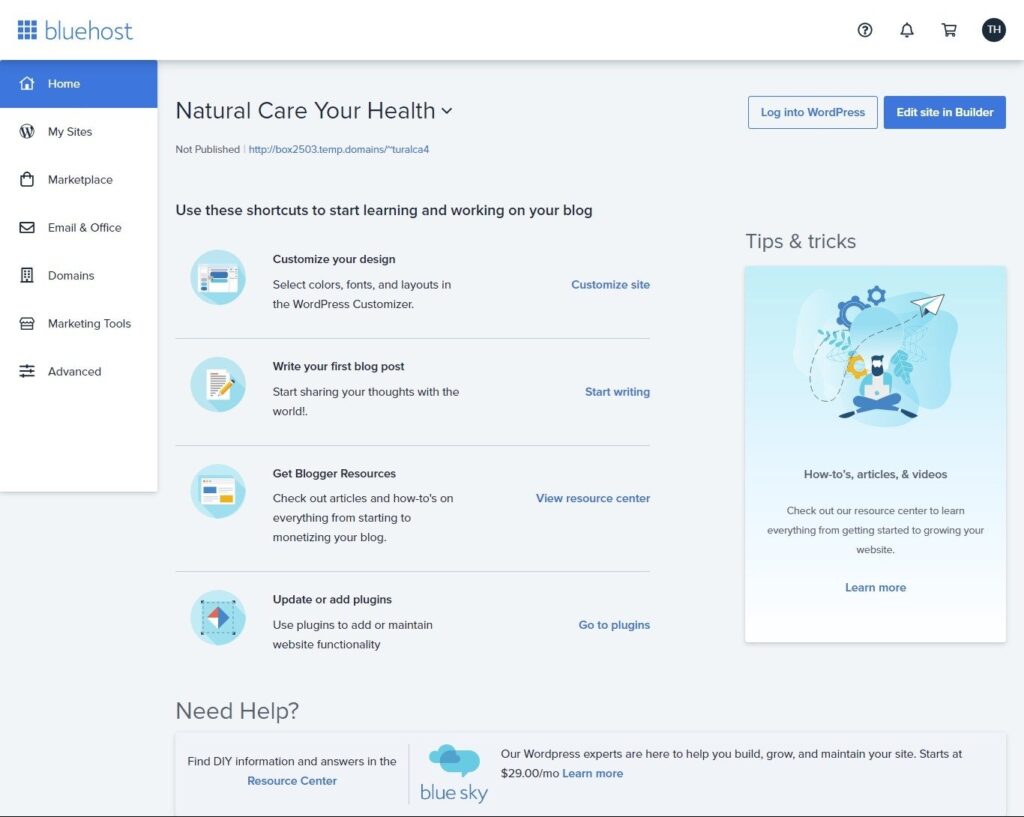
You can start to install WordPress once you completed the payment, log in to your account at Bluehost, Click on My Sites on the side menu of the dashboard, then click the Create Site button on the right side, see the details in the below screenshot.
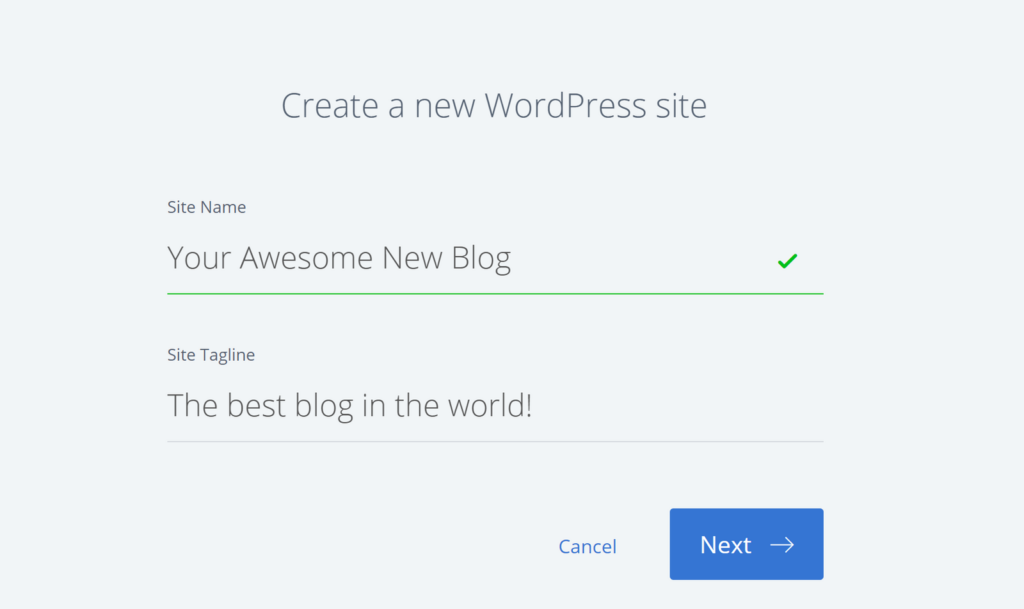
Now, you’ll be able to fill in some details for your site and email, and the username/password that you’ll use to login to the admin of the WordPress dashboard. once already, click on Next.
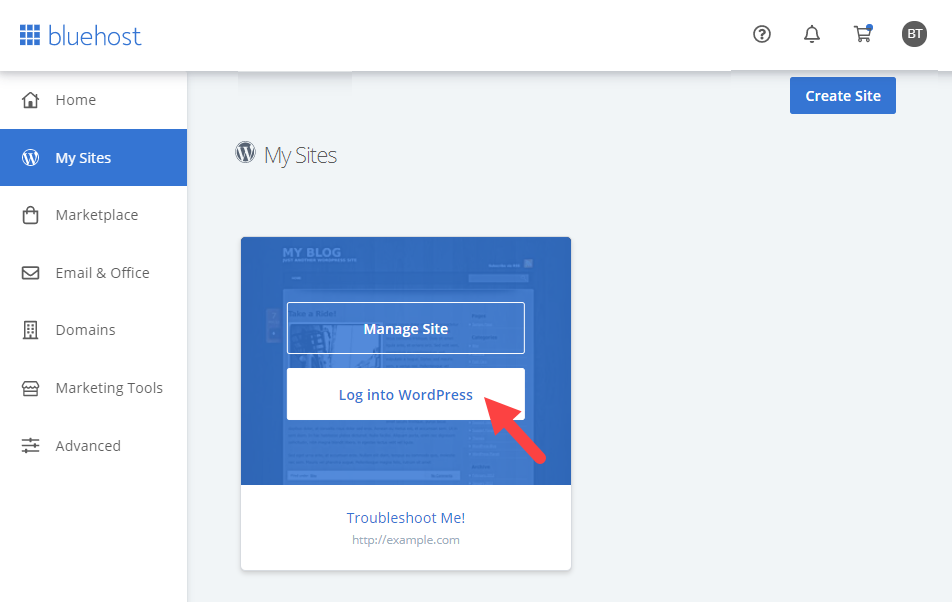
The installer will install WordPress within a few minutes, once all is done, you can click the My Sites on the side navigation again, you can login to WordPress or click your domain to check how your website is now.
That’s it, easier than you imagine, now you can start to manage your WordPress.
Conclusion
We introduced how to install WordPress on 3 web different hosting in this article, you should be able to install WordPress for your own website from most web hosting providers whichever you purchase. if you want to know how to create a website with WordPress, please check our ultimate tutorial.


